Sunday, November 13, 2022

North American AJ Savage Carrier-Based Tanker


The AJ Savage, the U.S. Navy's first carrier-based bomber that could carry the 10,000# Mk 4 nuke was not only big (humongous, really), folding it required so much time and effort that it wasn't done unless the Savage was a "dud" that had to be taken down into the hangar (see http://tailhooktopics.blogspot.com/2022/10/aj-savage-wing-and-fin-fold.html).

Coral Sea 1952; USN photo via Greg Bishop

Because its presence was so disruptive of operations on axial-deck carriers, AJs were usually based ashore and only flown out to a carrier periodically. If needed for a wartime mission, they would then be loaded with nukes that were stored on the carrier.

The advent of smaller, equally powerful nukes that could be carried by AD Skyraiders and F2H Banshees made the AJ even less welcome since the AD had about the same range. However, it was slow: the war might well be over before it got to its target. The Banshee's cruise speed was much faster than the AJ's but it had significantly less range. The best combination of range and speed for the mission was quickly determined to be en route inflight refueling of the Banshee by the AJ (https://tailspintopics.blogspot.com/2009/11/nuclear-banshees.html).

There are many pictures of the AJ refueling jets but no closeups of the refueling apparatus itself. Jerry Wells was able to provide me with detailed illustrations from North American manuals.

The AJ's cavernous bomb bay was just about filled with a 1,300 gallon fuel tank.

The hose reel and drogue-deployment mechanism was mounted on the back of the tank (the drogue is in the retracted position):

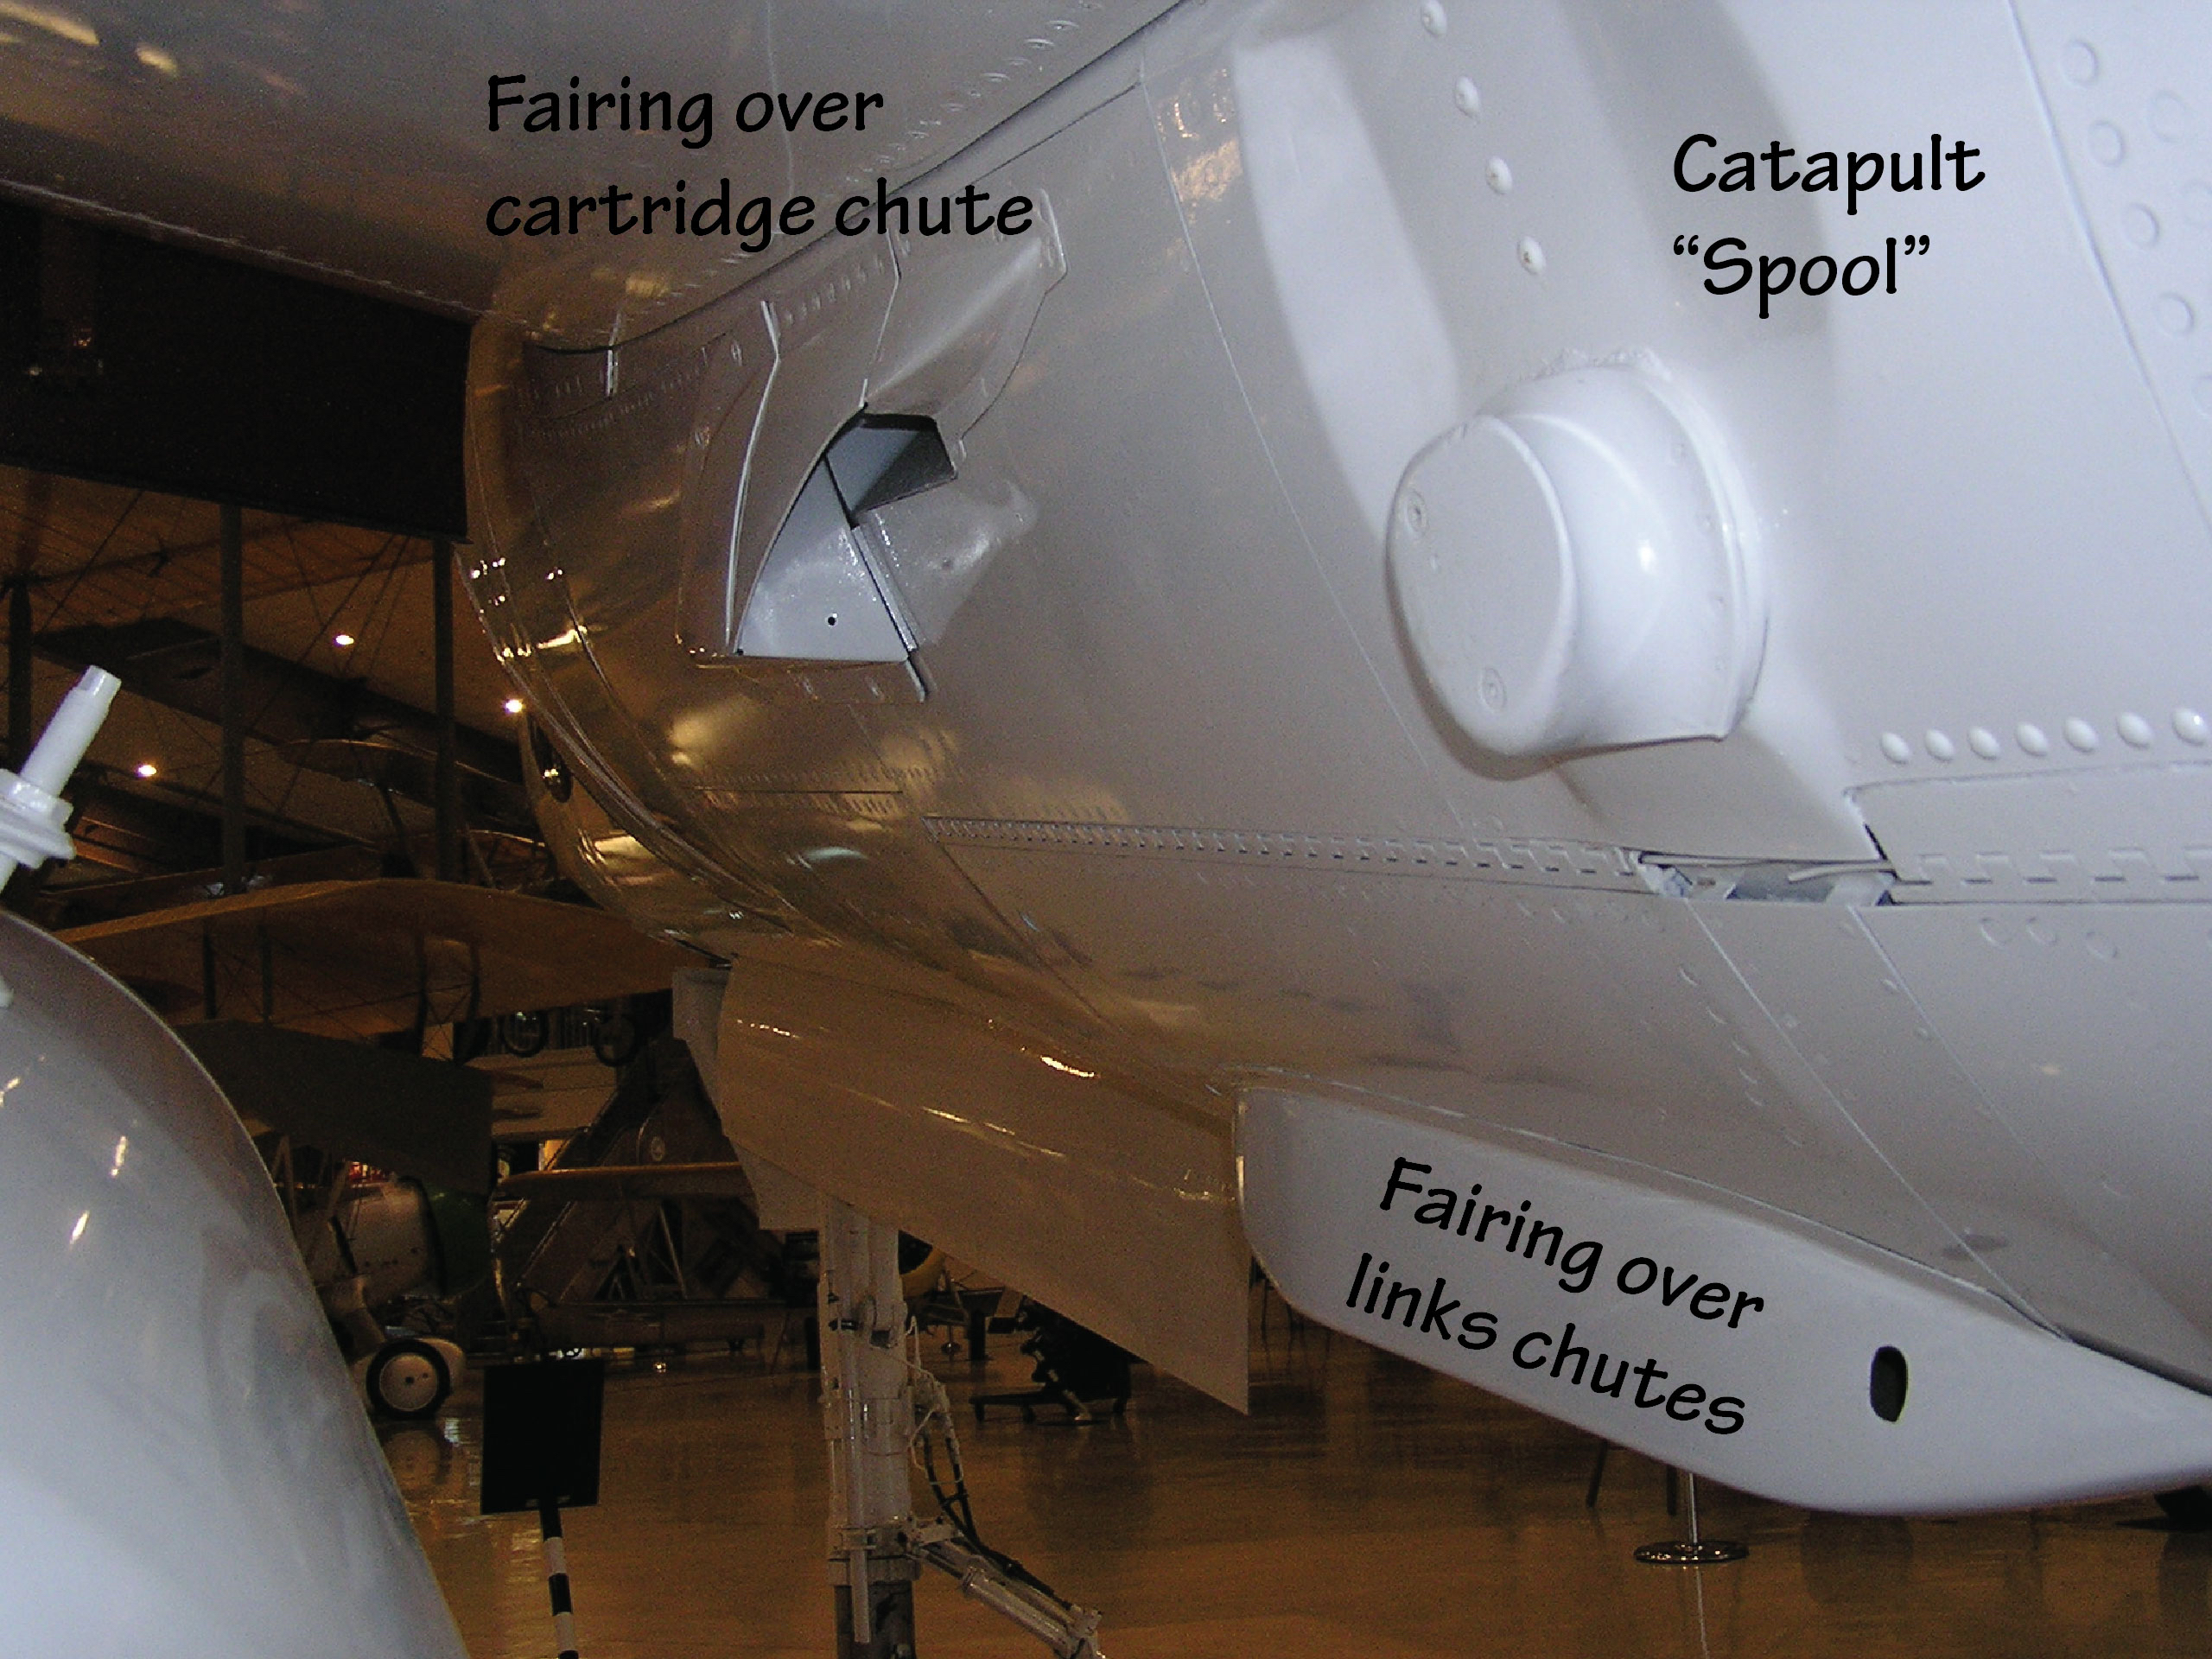
A small opening was provided in the bomb bay doors so the drogue mechanism could be deployed below the fuselage (because of the size of the drogue, the doors had to be opened to lower the drogue and then closed again).


 The right side of the hose reel (the drogue is not present):

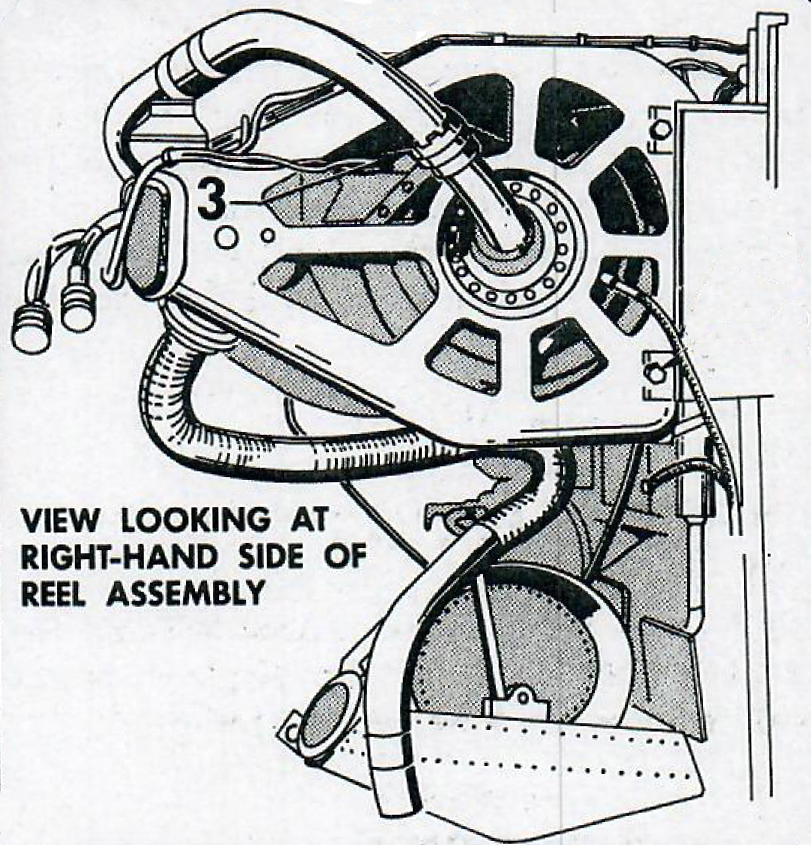
Note that the fuel from the tank to the reel is provided by a line on the left side of the tank that extends from its bottom up and over the reel, attached to it from the side (3).

The hose was fed down from the reel to the front side of the big pulley on the drogue mechanism and then aft to the drogue itself.

The drogue at this point was a metal cone.

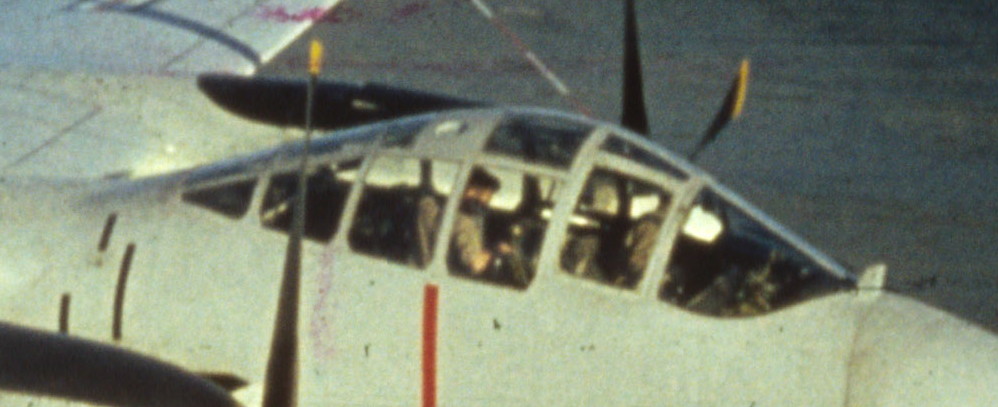
This is a prototype of the external mechanism being tested on an XAJ-1:

The operation of the refueling system was the responsibility of the rearward facing crewman on the AJ-2:

At least one AJ-1 was equipped for inflight refueling and assigned to NATC but I don't know where these panels were located on it (the AJ-1's third crewman's position was in the compartment below the flight deck).

I don't have any three-view or station drawings of the refueling mechanism or the opening in the bomb bay doors but in the event that a modeler feels the need to add them to a kit, these pictures will help locate and size them.


Sunday, October 23, 2022

AJ Savage Wing and Fin Fold

 For an overview, see https://thanlont.blogspot.com/2010/03/hell-it-wont-fit-ii.html

To reduce weight, North American eliminated the customary pilot-actuated power folding of the wings (and in this case the fin) in favor of a post-flight installation of hinges and power supply (hydraulic actuator for wing fold and arm-strong for fin fold).

For the wings, an access panel over the inboard side of the wing fold joint was removed. Two hinges were then attached to the wing at the fold joint. A hydraulic actuator was mounted on the rear hinge, which was bolted to the upper wing surface. The pins connecting the inboard and outer wings were then removed to allow the wings to be folded.

Hydraulic power was provided by a hose connected to the aircraft's hydraulic system at the top of the engine nacelle.

When folded, the exposed wing joint looked like this:


Folding the fin required the temporary installation of a long, folding access ladder:

The upper standoff of the ladder hooked into two slots just forward of the horizontal stabilizer (this is the AJ-2 empennage that was retrofitted to AJ-1s):


Next, the actuator had to be attached, the bolts holding the fin on removed, and the hand crank turned to fold the fin (this illustration is the empennage of the original AJ-1):

A view from the front of the final folded configuration (the sailor hugging the tip tank is checking to be sure that it will fit through the hangar door):


Saturday, October 22, 2022

AJ Savage Bomb Bay Doors

The new Roden 1/72 AJ-1 Savage kit provides interior detail in the bomb bay and conventional bombs to go in it, but the bomb bay doors are provided as a single piece, providing no view into the bomb bay.

Since the AJ Savage was literally designed around the Mk 4 nuclear bomb (one is provided in the kit), it seems appropriate that its cavernous bomb bay be visible...

Thanks to Jerry Wells, we have illustrations that can be used to convert the single-piece doors to separate ones in their open positions.

There were four separate, fairly thick doors with lightening holes along the sides. The upper door was attached to the fuselage and the lower door by piano hinges.

The doors were interchangeable. In the following illustration, they are partly open. The opening and closing was accomplished by a mechanism (A) between the upper and lower doors combined with an idler strut at both ends of the lower door that was attached to the fuselage bulkhead at either end of the bomb bay.

 The following illustration depicts the position of the actuation links between the upper and lower doors when the doors are closed:


Another view of the idler strut on the forward left hand side with the doors fully open:

The actuator was a very complicated mechanism that converted the longitudinal extension of a hydraulic piston into a rotation of the outboard link of the actuator that resulted in the doors being pulled together. The idler struts at each end of the bomb bay caused the doors to move outboard as they came together.

Note that when the doors are open, the links of the actuator mechanism are visible; they don't appear to extend inboard any farther than the bomb bay opening, however (this is a picture of the Lycoming AJ-2 Savage with the support structure in the bomb bay for the jet engine test rig):


The idler struts are more prominent:


For an introduction to the Roden kit and links to other posts, see https://tailspintopics.blogspot.com/2022/08/roden-172-north-american-aj-1-savage.html

Thursday, August 4, 2022

North American AJ Savage Canopies

The XAJ-1 Savage had a large, clear, sliding canopy similar to those on jet fighters.

 The AJ canopy was subsequently changed in four major steps:


No. 1 was a reinforcement of the canopy with Fiberglas straps. This was done for the initial production of a handful of aircraft.


Canopy No. 2 removed the sliding feature. It had metal framing, multiple Plexiglas panels, and an escape hatch beside both the pilot and the bombardier.

 Although an early AJ-1 flight manual shows that the third crewman, who occupied a seat in the fuselage ahead of the bomb bay, was supposed to utilize the bombdier's flight-deck escape hatch, at some point he appears to have been provided with his own in the top of the fuselage (this may have been the reason for the added sheet metal at the rear of the canopy).


Canopy No. 3 enlarged the pilot and bombardier escape hatches. This version appears to have been incorporated along with the modification of surviving AJ-1s to have the AJ-2 empennage.

Finally, canopy No. 4 was unique to the AJ-2. This change was required by the move of the "third crewman" position from the lower compartment in front of the bomb bay up to a rearward-facing seat on the flight deck. The metal panel in the top right of the canopy was a port for the use of a sextant.


Final AJ-1 and production AJ-2 canopy comparisons:

More AJ Savage information can be found at the following links:

 https://tailspintopics.blogspot.com/2021/03/north-american-aj-savage-model-kits.html

https://tailspintopics.blogspot.com/2011/07/aj-savage-notes.html

https://tailspintopics.blogspot.com/2013/04/aj-2-savage-cockpit.html

https://tailspintopics.blogspot.com/2011/07/getting-it-right.html 

https://tailhooktopics.blogspot.com/2013/01/aj-savage-bombardier-station.html

http://tailhooktopics.blogspot.com/2022/10/aj-savage-bomb-bay-doors.html 


Friday, July 1, 2022

McDonnell F4H Total Air Temperature Sensor

 In my monograph on the birth of the McDonnell F4H-1 Phantom II (see http://www.ginterbooks.com/NAVAL/NF108.htm), I only made a passing reference to its Central Air Data Computer (CADC) and provided no details on the requisite Total Air Temperature sensor. However, since the subject of its location has come up, herewith is a discussion of the requirement and specifically, its presence on the U.S. Navy F-4s.

As airspeed increases, a simple outside air temperature (OAT) sensor begins to read high due to air compression and friction. Up to about 300 knots the increase is negligible. However, at higher speeds it is increasingly important to correct for it in calculations that require an accurate measurement of OAT. The result was the development of the Total Air Temperature sensor.

Moreover, the proliferation of aircraft systems that relied on basic air data resulted in the desire for a CADC that would serve as a single source for it.

The CADC in the F4H was one of the first applications, if not the first.

The first flight of the F4H was expedited in order to beat its rival, the Chance Vought F8U-3 into the air. That is probably why it had a simplified engine inlet ramp and no TAT sensor. One was subsequently added, though, under the nose.

Note that the sensor is mounted on a post so that its inlet is beyond the boundary layer air.

On the second F4H, the sensor was mounted on the forward-facing nose landing gear door.

For various reasons, however, the sensor was not installed on all of the early F4Hs, most notably on No. 6, the carrier-suitability F4H, where it was probably displaced by the angle-of-attack lights and high-speed flight was not a factor.

The sensor was subsequently relocated to the leading edge of the vertical fin at some point during Block b production (BuNo 145307-145317):

Note that it's not nearly as prominent as depicted in the illustration above from the February 1961 Plane Captain's Handbook and in this location, no standoff is required.

It was subsequently relocated from the vertical fin to just under the left ECS inlet fairing. The reason give for the change was: "Prevent total temperature sensor from being damaged by precipitation."

Almost half of the total F-4Bs produced were delivered with the fin-mounted TAT. According to Peter Greengrass, my go-to F-4 subject matter expert, "It was relocated by ASC-139; production effectivity was Block 16 (BuNo 151399), which first flew in July 1963".

As a result, early F-4Bs (and USAF Cs were delivered with the fin-mounted TAT sensor. For example, VF-102 went aboard Independence in January 1962 with F4H-1s with the fin-mounted TAT:


Other examples provided by Peter include F-4B BuNo 149429 in May 1965:

F-4B BuNo 149406 marked up as the F-110A:

And the first F-4C, 63-7407, photographed at Lambert Field in August 1963:

The RF-4B has the TAT located on the forward-facing nose landing gear door.